There is the traditional method of fashioning styrofoam boxes to look like troughs:
In a nutshell, a chosen form's surface is roughened in whatever fashion by physically scratching and gouging with a favorite tool, the purpose of which is to mimic natural rock or whatever is desired. The surface is heated to solidify the roughened exterior and prepare it for painting, and then painted. But let the specifics of this method be for another topic. Here I want to show some newer ideas that have emerged since Ian Young first invented the very versatile styrofoam trough concept.
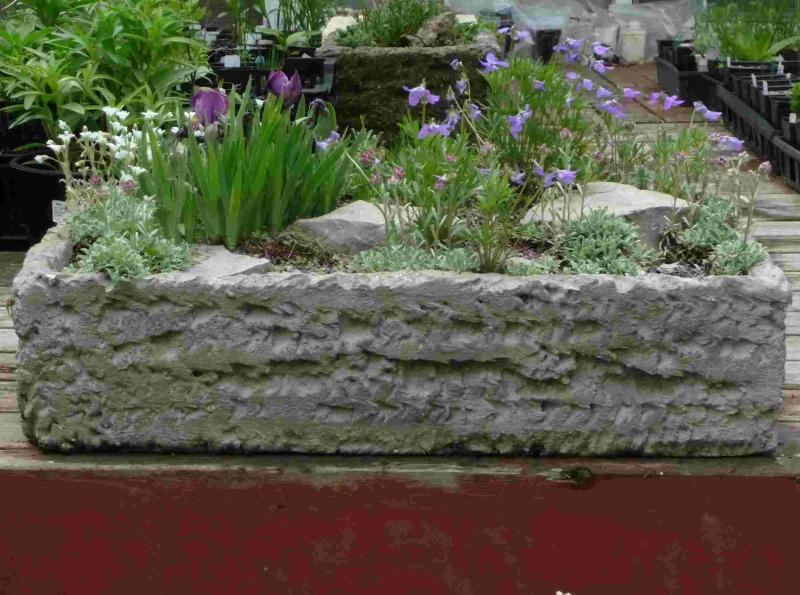
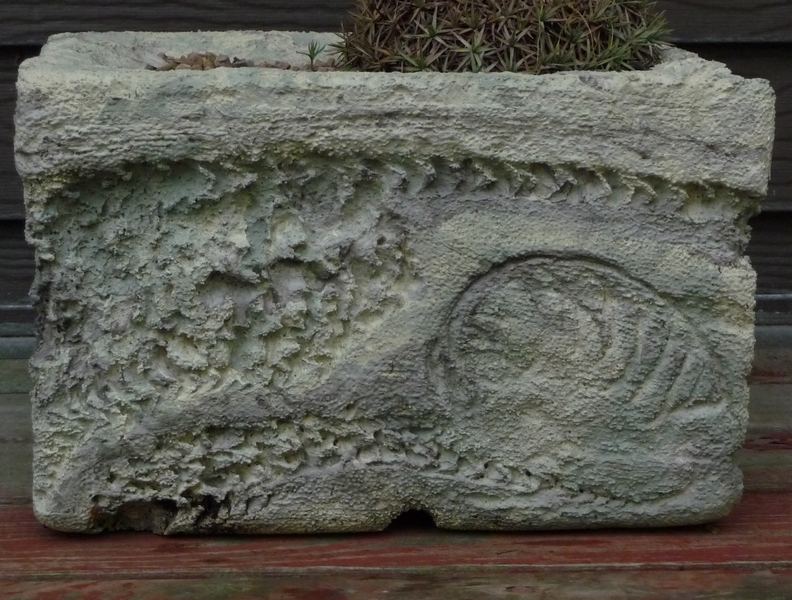
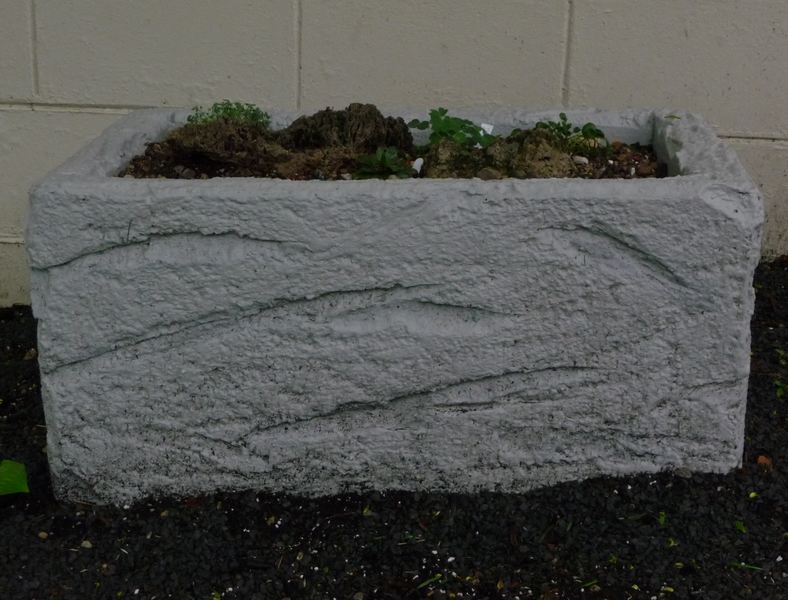
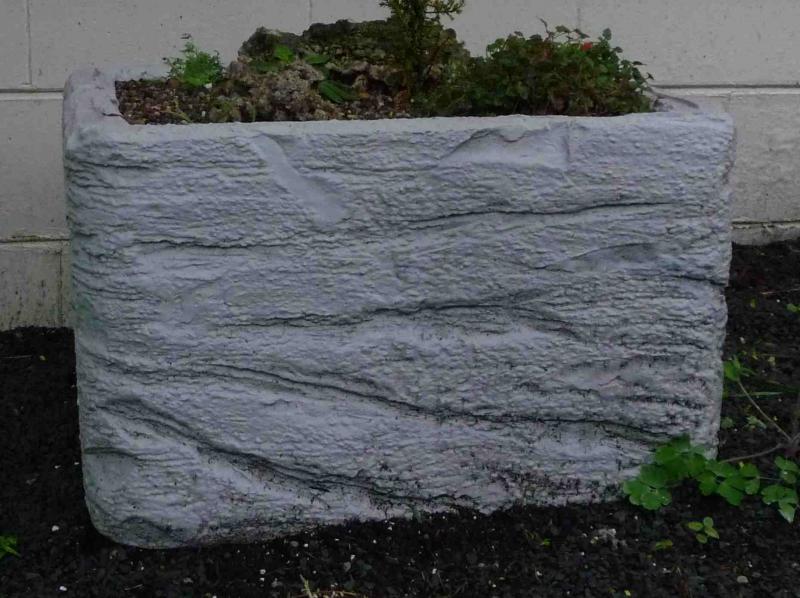
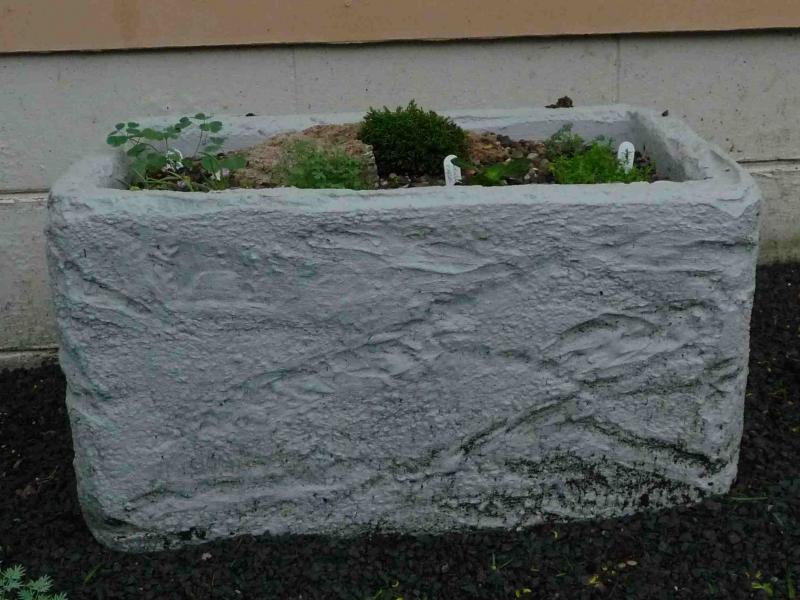
First, some photos of troughs done via the traditional method for comparison.
Still the most realistic method, in my opinion, but it is a bit messy to execute, and more time consuming compared to the ideas to come.

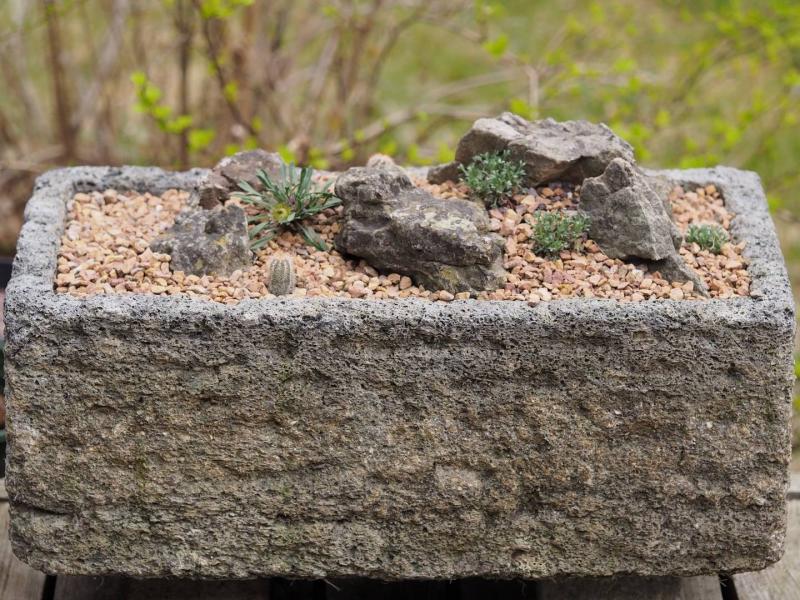
Now some styrofoam troughs made in the "traditional" manner:

![]()
Some members in our Chapter have experimented a little, and come up with a couple time saving and less mess alternatives.
The first is invented by Julie. She has access to styrofoam boxes used for transport of medical vaccines, live organ transplants, etc. These are thicker than the traditional fish boxes, and they allow her to incorporate that quality into her method.
Rather than manually texturing the surface, her idea is to use the heat gun to create depressions in the styrofoam walls by heating (and shrinking) some parts more than others. The method is super quick, and there is absolutely no mess. Once done, it is ready for painting.

Another Chapter member, Ev, came up with this idea: she uses an old iron to initially melt the desired "pattern" into the styrofoam before a quick brushing with a wire brush. Then she uses the heat gun in the traditional manner to ready the box for painting.
------------------
So what do you all think? Of course, no one has a monopoly on inventions, and someone else could have independently come up with the same ideas just described. Undoubtedly, there have been other experiments tried. Who would like to share their thoughts, successes or failures?


Comments
Re: Styrofoam Trough Innovations
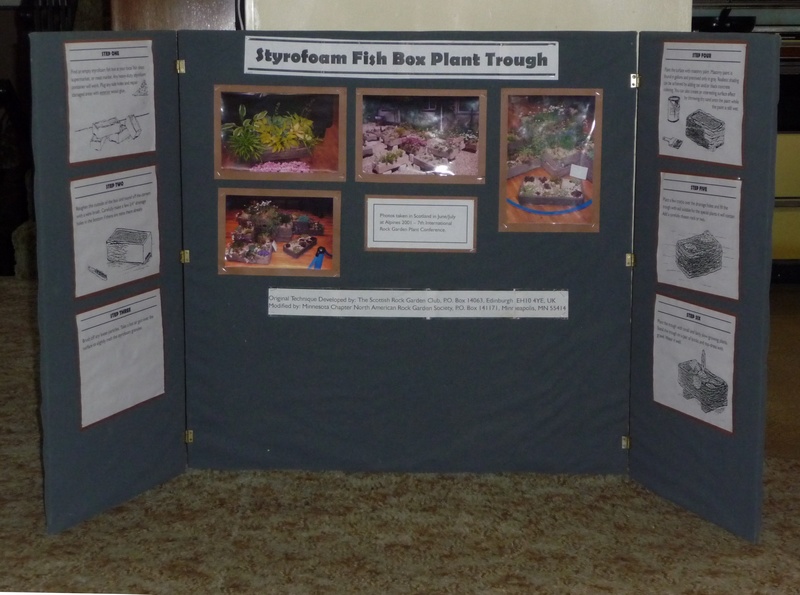
We have found a stryrofoam trough display to be the best "attractant" at garden show functions. People flock to it like flies compare to other presentations. I was not involved in the making of this backboard; it is more than a decade old, and needs a revamping. But, it still does the job! We always have a planted trough in the center, which is why there is an "empty" area on the board.
Re: Styrofoam Trough Innovations
Thank you Rick - I think I will try and do something similar at our Show. I will do a little research on the SRGC site too.
Re: Styrofoam Trough Innovations
They all look very serviceable!
Are those your troughs at the top, Rick? (I'm guessing so from all the potted plants in the background - probably destined for your chapter plant sale, I'd bet. ) The troughs look really nicely planted up. If you don't mind me asking a slightly off-topic question, what is the blue flower in the first trough? I can't figure it out.
Looks like a Viola species? Agreed, nice looking troughs.
Re: Styrofoam Trough Innovations
Are those your troughs at the top, Rick?
Actually, the only one that is mine is the one in the lower left. It was my first styrofoam endeavor. I am not that proud of it, but it is different so I thought it was apropos here. The ones in the upper left and lower right were made by another Chapter member, Shirley. They are my plants, though. She does the best work of anyone, in my opinion. The one in the upper right (with the dead Acantholimon) was another done by Julie. She didn't like it, so she gave it to me!
The blue flower, Mark has got it right: Viola pedatifida. Quite a mundane form, I might add.
Re: Styrofoam Trough Innovations
The blue flower, Mark has got it right: Viola pedatifida. Quite a mundane form, I might add.
I was going to guess this Viola species, but there was enough blur to the photo when viewed full size that I couldn't be totally sure, a species that I have posted about and have in the garden here (in a rather good form I think).
Re: Styrofoam Trough Innovations
Ah, that's what it is then - very nice, mundane form or not.
I think I actually prefer the rougher texture of the upper troughs, if I had to choose, but both look good.
(My own hyper-tufa troughs lack any texturing on the outside, though they would have been better for it.)
Re: Styrofoam Trough Innovations
Such fun! These new methods are grand.... though, if I'm going to be picky, I'd prefer some more colour tones in the painting. ;)
I must show this thread to Ian... he'll love that you are using all these ideas and modifying them.
I'm not at all surprised that you find these troughs make a fascinating subject for shows and s displays.... the SRGC has had that effect every time too... and in fact I've never known such a presentation NOT work to bring tremendous interest. The whole thing is just FUN.. and really useful for getting portable troughs.
Well done the Minnesotans!
Cheers!
Maggi
Re: Styrofoam Trough Innovations
For anyone who is interested in making some fish box troughs, here are some useful links.
The first is to an article by Ian Young at the SRGC site that lays out all one needs to know about his ingenious method!
http://www.srgc.org.uk/feature/fishbox/troughs.html
http://www.srgc.org.uk/feature/chris/troughs.html
Here is a more complicated variation on the theme, sort of a hybrid between the fish box trough (which uses masonry paint on top on top of the textured styrofoam fish box exterior to create the impression of stone) and the hyper-tufa trough. This method involves slathering a purchased grout mix onto the outside of a fish box to create a stone-like texture.
http://nargs.org/nargswiki/tiki-index.php?page=Troughs
Re: Styrofoam Trough Innovations
Such fun! These new methods are grand.... though, if I'm going to be picky, I'd prefer some more colour tones in the painting. ;)
Maggi
Applying a mix of earth-toned masonry paint colours, as described in Ian Young's article, sounds fabulous for giving the immediate impression of age and long residence in the garden! (Masonry pigment can also be mixed into the grout or hyper-tufa mix to add colour in these different methods.)
It takes a long time here for lichens to colonize, and moss doesn't seem prone to grow on my hyper-tufa troughs, so even after many years, they still look raw and stiff! I love the ideas of both texturing and natural colouration!
Hmm, I wonder where I can get some suitable styrofoam boxes?
Re: Styrofoam Trough Innovations
Try tropical fish suppliers Lori.
Re: Styrofoam Trough Innovations
Occasionally, (not as often as five years ago) they show up in grocery stores, in the self packing box bins. Grapes shipped from California. The bottom is 10cm deep. The whole box measures 48cm x 38cm x 17cm. approximately.
Re: Styrofoam Trough Innovations
Yes, I hear from other members who have gotten there fishboxes from the grocery store before, that many markets are going to plastic instead of styrofoam.
That little size, Sharon, would sure make cute troughs. I have never seen them here, though.
One nice thing about styrofoam is that if the box you have is too high, one can easily cut it down to the height desired.
Another couple ideas I should have mentioned before. Unfortunately, I didn't get pictures of them:
1) Some artists will melt some holes through the side(s) to plant in. In theory one could make it look like the trough has cracked. But be careful! When you do such things, (and depending on other factors like wall thickness and size of the box), you might also be creating weaker spots that could fail when transporting the planted trough.
2) Dips along the trough rim can be the perfect invitation for a cascading plant to ramble over the edge. Done right, it can look very natural.
This is another example of the traditional styrofoam trough styling. This was created by my friend Julie, but the dead Acantholimon is mine. ;D

Re: Styrofoam Trough Innovations
Thanks for the advice on where to get them. I'll have to give this a try. Nice examples, Rick.
Re: Styrofoam Trough Innovations
Thanks for the advice on where to get them. I'll have to give this a try. Nice examples, Rick.
I'd say go straight to the departments- meat/fish and produce to ask if they get anything in.. probably goes straight into the garbage.. I think we may get some in our store occasionally, but I have a feeling if they smell like fish/meat my 'driver' would never allow them in the vehicle...lol
another thought- though they are not the same shape- is the cheap styrofoam 'coolers'- for picnics etc, which are readily available, and could be cut down to size-- they are usually tapered though, not straight rectangular...
Re: Styrofoam Trough Innovations
Styrofoam boxes need to be of the denser type - food grade or higher.
Those used for bulk flowers are not really strong enough.
Re: Styrofoam Trough Innovations
Styrofoam boxes need to be of the denser type - food grade or higher.
Yes, I would imagine so...
Styrofoam coolers seem a bit fragile even for their intended use, so I'd be hesitant about packing heavy alpine mix into them (plus the tapering-to-the-base shape seems a little off to me, for some reason).
Carving on the sides to give texture must reduce the strength quite a bit as well, so starting with a sturdier box seems very well-advised.
Re: Styrofoam Trough Innovations
Carving does reduce strentgh but happily, the heat sealing with a powerful hairdryer or hot air blower ( paint stripper thingy!) makesthe surface very strong and seem to redress the balance of the overall strength again.
Re: Styrofoam Trough Innovations
I had thought about that, too. It's good to hear another vote of confidence.
I have found from instructing classes on styrofoam troughs, that students, in general, really don't don't have a clue as to how much melting of the surface is correct. Something I had previous thought to be pretty intuitive.
Re: Styrofoam Trough Innovations
I have found from instructing classes on styrofoam troughs, that students, in general, really don't don't have a clue as to how much melting of the surface is correct. Something I had previous thought to be pretty intuitive.
As yes, well one man's intuition can be another's PHD thesis ;)
It can be useful for demonstration purpose to get some offcuts of chunky styrofoam ( the type used in insulation and building works) and to ....
1) roughen an area.... let the students feel the roughened surface
2) lightly heat an patch ... let them touch that to feel the difference
3) seal the surface "properly"... let them see the shrinking and sheen on the surface now... and feel it again... the feel alone is quite telling and seems to get the necessary finish more firmly in their minds.
4) Do take a second to overheat a section, to let them see the destruction.
As an aside to that, you can demonstrate making slits for planting in side-walls, of course.
Not always easy to do all this while keeping the work area well ventilated and keeping the loose granules from flying everywhere, but worth it!
Going back to the idea of hot air carving , rather than actual shaping of the sytrofoam with stick or wire brush.... remember that this may generate more fumes, so keep plenty fresh air through the work area.
(I've already assumed that masks are being worn!)
Re: Styrofoam Trough Innovations
There are styrofoam coolers sold at our local tire store which could be cut to form a shallow trough. They are usually available when fishing supplies are being stocked.
Re: Styrofoam Trough Innovations
There are styrofoam coolers sold at our local tire store which could be cut to form a shallow trough. They are usually available when fishing supplies are being stocked.
If those are the kind that hold water for minnows, then they are probably strong enough, I would think. I suspect, though, that they are regular coolers for beer, etc. These don't have the strength integrity needed for lasting troughs.
I've not tried doing this yet but have always wanted to after reading about Ian Young's techniques. I think I like the top troughs best, but wire-brushing looks to give a good effect. This will make me go and read Ian's description again on the SRGC site. It would be a great demonstration for our local Alpine Show!